
Learn the Step-by-step Process for Safely Disassembling Binoculars With Precision and Care
Binoculars, those amazing tools that let us see things far away, are really interesting devices that make us think about how they work inside. Whether you’re someone who likes to learn about things or you’ve had a situation where your binoculars fell and need fixing, knowing how to take them apart can be a useful skill. If you are facing issues to restore and maintain vintage binoculars that will be different. In this guide we will go through the general system of disassemble binoculars. We will look at how to open up binoculars and see the parts that help us see faraway things clearly.
Step 1: Gather Your Tools and Workspace
Before you start taking apart your binoculars, make sure you’ve got a tidy and well-lit place to work and all the tools you need. You’ll need a set of precision screwdrivers, tweezers, a clean cloth, a small container for storing screws, and a soft surface to place the disassembled parts.
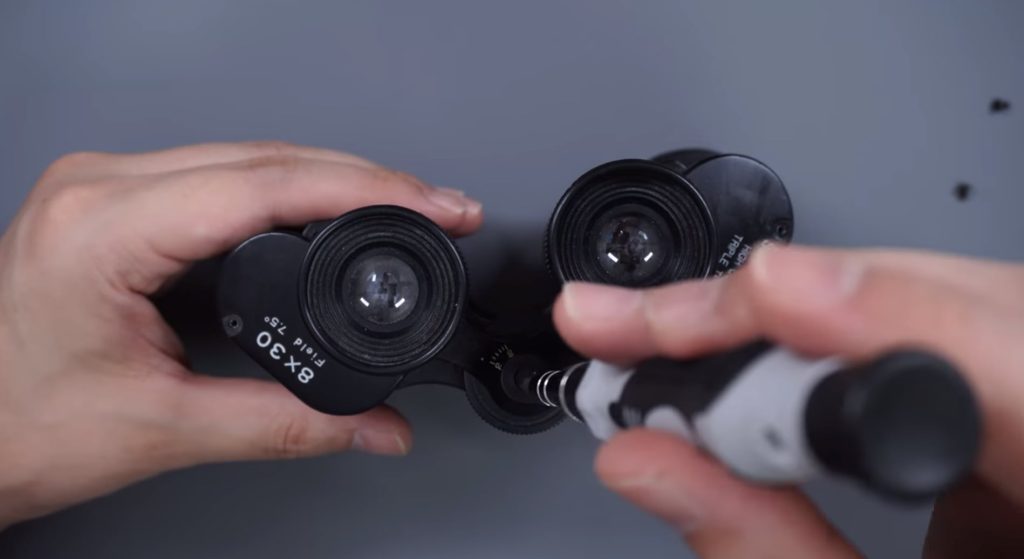
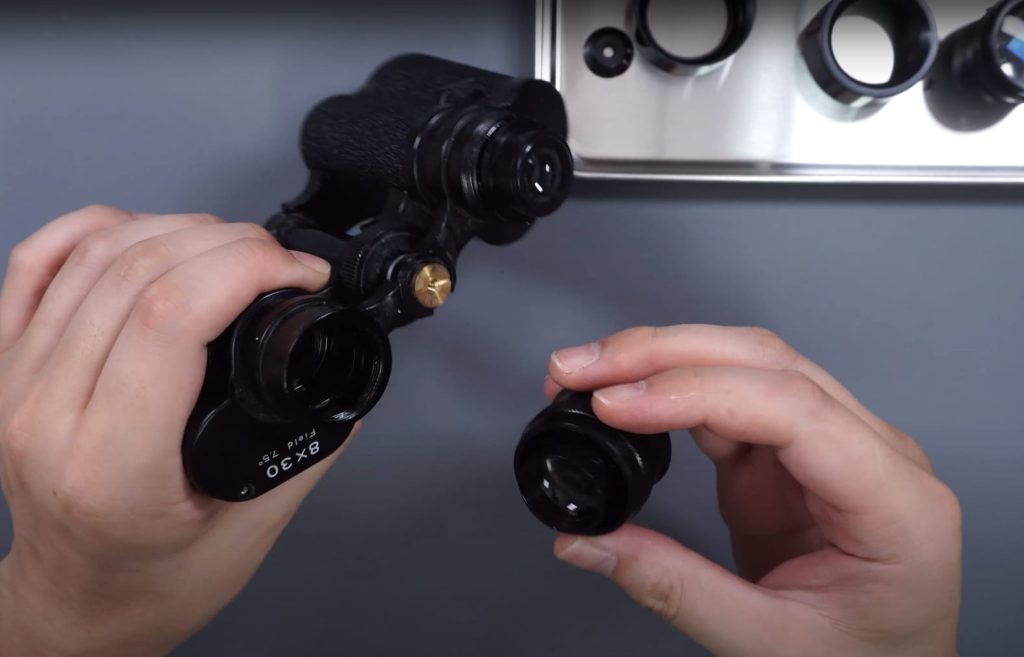
Step 2: Remove the Eyepiece Covers and Lens Caps
Start by removing the eyepiece covers and lens caps from your binoculars. These are often held in place by friction or small tabs. Gently pry them off using your fingers or a non-abrasive tool to avoid scratching the lenses
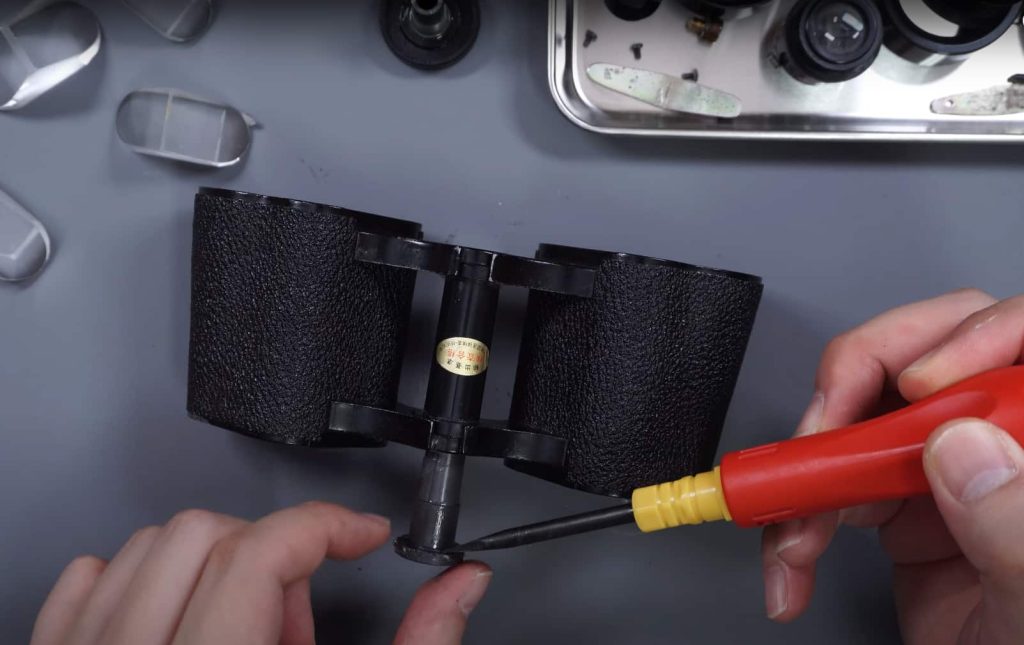
Step 3: Locate and Remove the Exterior Screws
Examine the binoculars for screws that hold the housing together. These screws are typically located on the sides or underneath the bridge (the central part that connects the two optical tubes). Carefully use the appropriate size of precision screwdriver to remove these screws, placing them in the container to keep them organized.
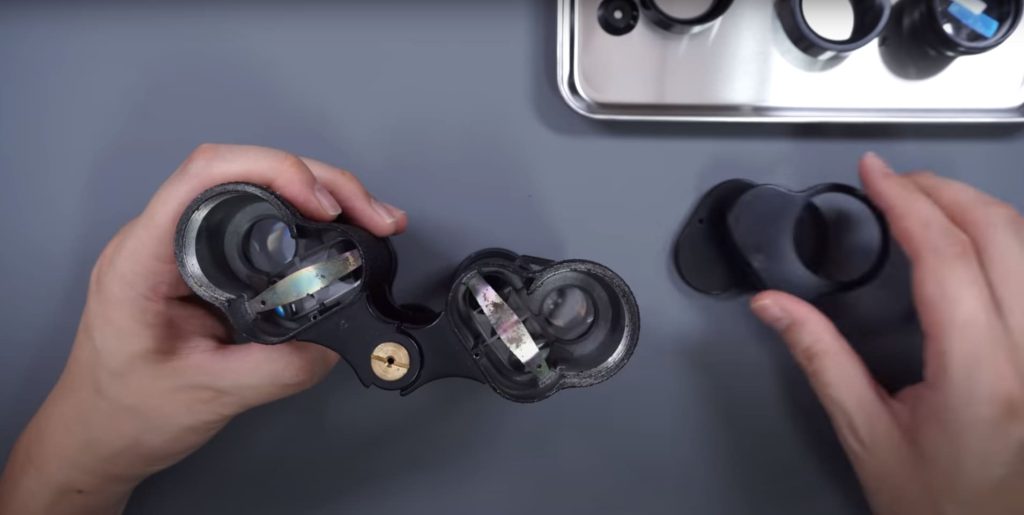
Step 4: Separate the Optical Tubes
Once the exterior screws are removed, gently separate the two optical tubes. You may need to apply slight pressure or wiggle them apart, being cautious not to force anything. This will expose the internal components.
Step 5: Access the Prism Assembly
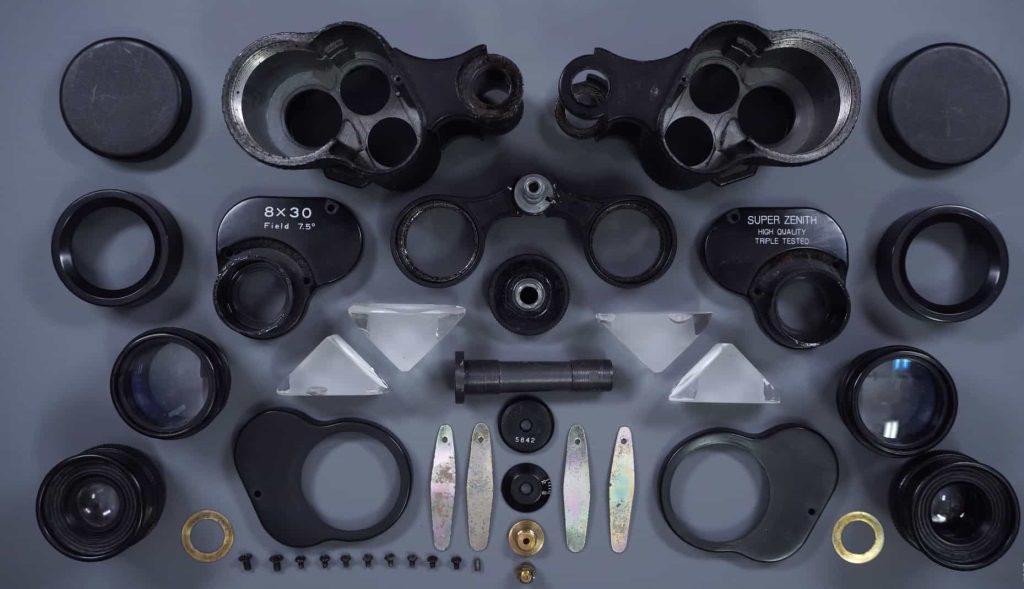
Inside the binoculars, you’ll find the prism assembly, responsible for reflecting and redirecting light to achieve the correct orientation of the image. Carefully locate the screws that secure the prism assembly. Depending on the model, you might need to remove additional components, like the focusing wheel, to access these screws.
Step 6: Remove the Prism Assembly
Using your precision screwdriver, carefully remove the screws holding the prism assembly in place. Keep track of the screws and any washers that may be present. Once the assembly is free, gently lift it out and place it aside.
Step 7: Focus Mechanism Disassembly
If you want to go more inside the binoculars, you might have to take apart the focusing thingy. This mechanism allows you to adjust the focus of each eyepiece independently. Locate and remove any screws holding the focus wheel housing in place. As you disassemble, take note of the arrangement of components to aid in reassembly.
Step 8: Removing the Lenses
To get to the lenses, you may have to take apart the optical tube more. You have to be very careful at this stage, because the lenses are fragile and can get scratched or harmed easily. Usually, there will be retaining rings or threaded sections that hold the lenses in place. Use appropriate tools to carefully unscrew or remove these components.
Step 9: Cleaning and Maintenance
While the binoculars are disassembled, take the opportunity to clean the lenses and prisms. There are lots more steps to clean binocular lens carefully. Use a soft, lint-free cloth and specialized lens cleaning solution. Please, you must be kind and not use too much force. When you clean the inside parts, it will make the image clear like it should be.
Step 10: Reassembly
As you put your binoculars back together, follow the steps in reverse order. Begin with the lens placement, securing them with retaining rings or threads. Reassemble the focus mechanism if you disassembled it, ensuring the components are aligned correctly. Carefully reattach the prism assembly, taking care not to over tighten screws. At last, make sure to fasten the housing by putting back and making the outside screws tight.
Taking apart binoculars can feel really intimidating at the beginning, but if you have patience, the correct tools, and a systematic way of doing it, it’s like a trip where you can learn about the complex inner workings that make these amazing optical devices actually work. Whether you’re curious or you have to do it, always keep in mind that being cautious and paying close attention to the details are super important to take apart and put back together your binoculars successfully. So, just go ahead, uncover the hidden things inside, and start to understand more about the technology that lets us see faraway things.